PN532 RFID/NFC reader
Overview
| Manufacturer | Philips semiconductors |
|---|---|
| Name | PN532 |
| Datasheet | pn532ds.pdf |
| Adafruit | PN532 NFC/RFID controller breakout board1 |
| ESPHome component | pn5322 |
| ESPHome API docs | pn532.h File reference3 |
| ESPHome config | packages/sensors/rfid.yml4 |
| Supply voltage | 5 |
Supports both SPI and I²C for communicate, reads NFC/RFID tag is able to write to (programmable) tags.
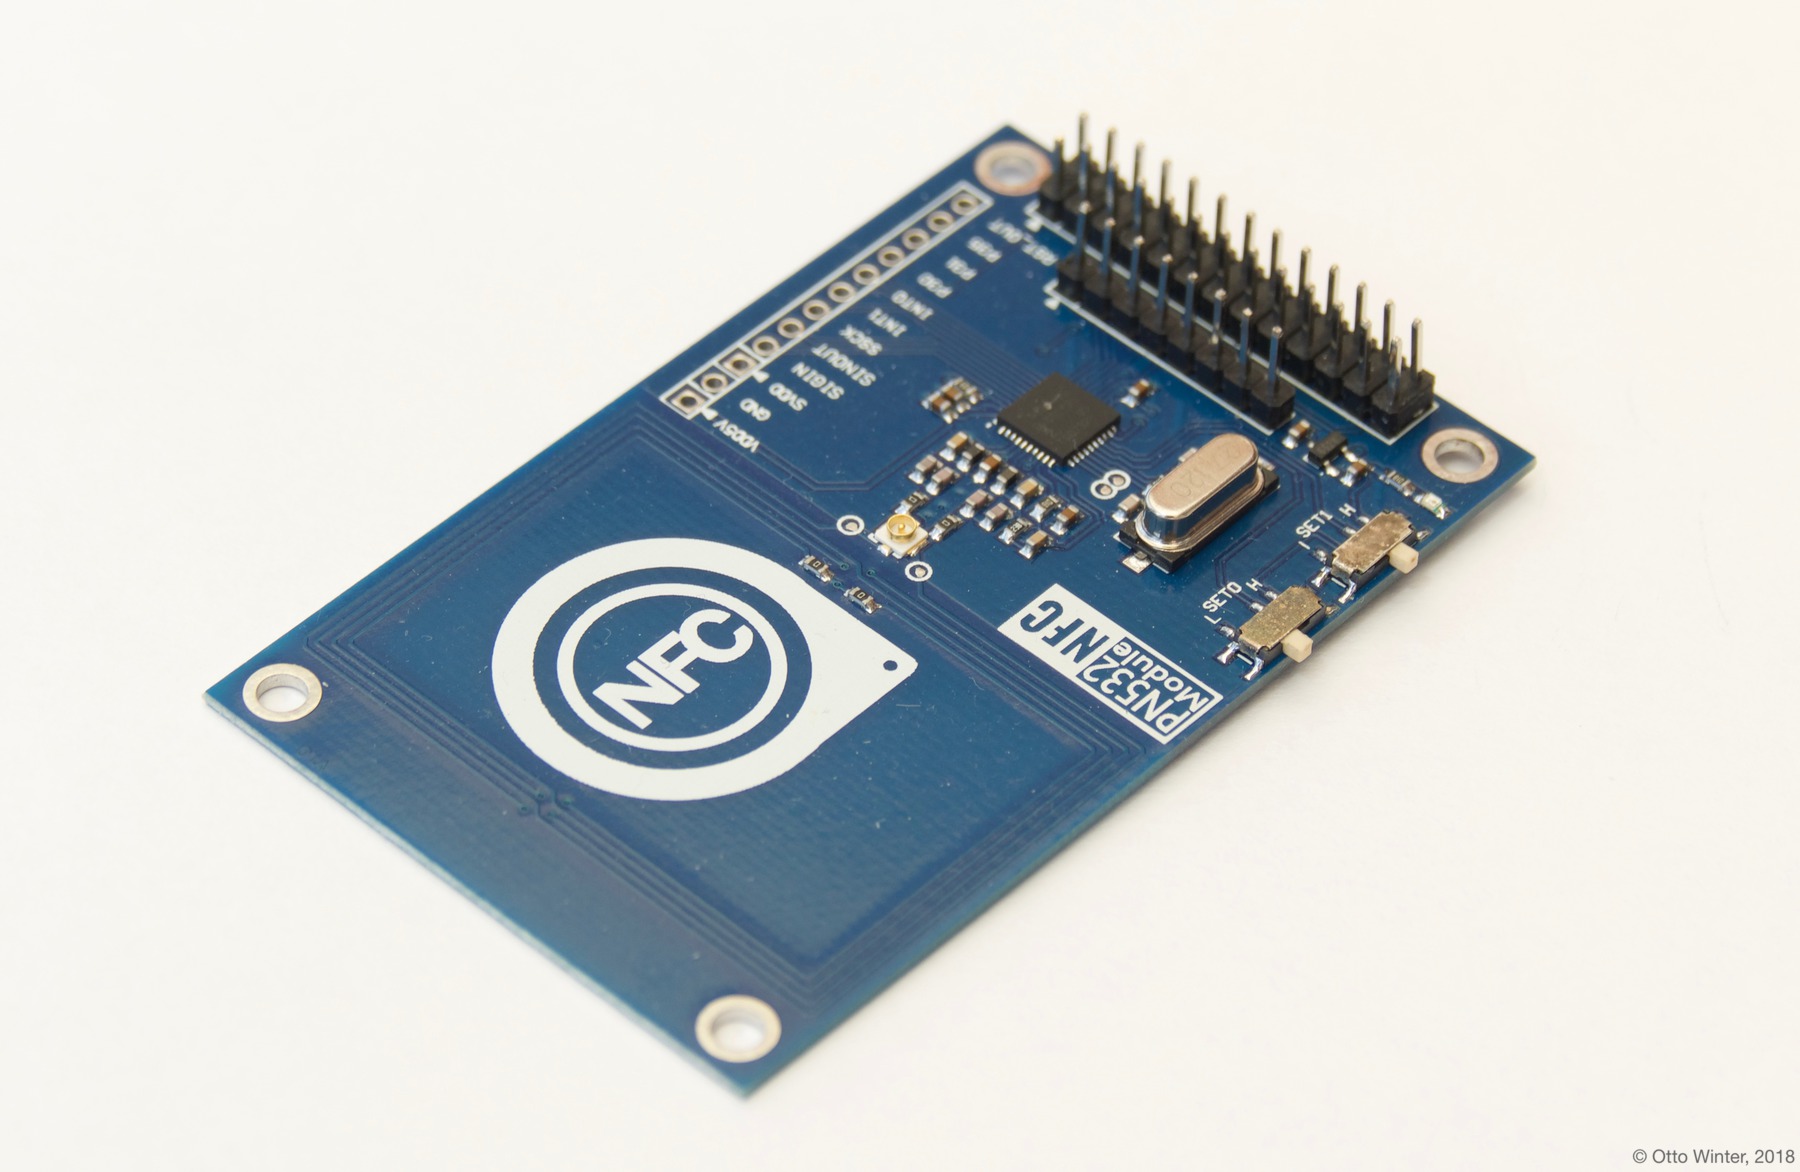
One variation of a PN532 breakout board.
Since the PN532 is able to communicate over either the SPI or I²C, there is usually dip switch to config whichbus the module will usw .
Pinout
If there is no table on the silkscreen, usually2 this is how they are set up:
| Protocol | 1 | 2 |
|---|---|---|
| SPI | OFF | ON |
| I²C | ON | OFF |
ESPHome config
Using the I²C bus:
i2c:
  - sda: ${gpio_sda_pin}
    scl: ${gpio_scl_pin}
    id: i2c_pn532

pn532_i2c:
  i2c_id: i2c_pn532
  update_interval: 200ms
But this doesn't do much at all, other than connecting over the I²C bus.
Send a tag_scanned event to Home Assistant
To send a tag_scanned event to Home Assistant, we need to create
an on_tag automation in the ESPHome config:
pn532_i2c:     # or pn532_spi
  on_tag:
    then:
      - homeassistant.tag_scanned: !lambda 'return x;'
Which will make your tag show up in Home Assistant under /config/tags
where you can assign names to them and create automations.
Unfortunately its not possible to use the name/friendly name of the tag in an
automation trigger, only the uid of the tag (tag_id in the tag platform
on the Home Asssistant side).
automation:
  - alias: my_tag_scanned
    trigger:
      - platform: tag
        tag_id: DE-AD-BE-EF
    condition: []
    action: []
This automation (on the Home Assitant side) will be triggered by the on_tag automation
fired by ESPHome.
Template sensors to detect when a tag is scanned
When a tag is scanned, the pn532 component will by default write the UID of
the scanned tag (as well as type) to the logger component.
This data is delivered with ESPHome events, that we can capture and publish to
templated sensors with automations provides by the pn532_... components.
text_sensor:
  - platform: template
    id: tag_uid
    name: "${hostname} Tag UID"

binary_sensor:
  - platform: template
    name: "${hostname} Tag scanned"
    id: tag_scanned
    publish_initial_state: true
    # Return last known state, avoids an 'unknown' state on boot
    # Could also use the on_boot trigger (might be better, the lambda is continuisly evaluated)
    lambda: !-
      return {};
    filters:
      - delayed_off: "10s"
Then we combine the on_tag and on_tag_removed automations to publish state to
the templated binary_sensor and sensor entities.
pn532_i2c:
  on_tag:
    then:
      # Writes the tag's uid to the text_sensor
      - text_sensor.template.publish:
          id: tag_uid
          state: !lambda 'return x;'

      # Set the binary_sensor to true/on
      # binary_sensor state intead of relying on automations
      - binary_sensor.template.publish:
          id: tag_scanned
          state: ON

  on_tag_removed:
    then:
      # Set the binary_sensor back to false/off.
      - binary_sensor.template.publish:
          id: tag_scanned
          state: OFF
The value of the text_sensor will persist and show the uid of the last scanned
tag, unless you add an on_tag_removed action to clear it. That means that if the
value changes, a tag has just been scanned.
Use a binary_sensor to track known tags
The pn532 component also provides a binary_sensor platform to trafic a tag with a known
UID is scanned.
binary_sensor:
  - platform: pn532
    uid: "${tag_uid}"
    name: "NFC ${tag_name}"
    filters:
      - delayed_off: 10s
This can for example be comined with another automation and template sensor to track when the tag was last scanned.